The Bentwaters Cold War Museum is now open for more information and contact details click the logo.
![]()
Bunker open day September 2001
This
opening was a unique occasion when the veterans of the
81st TFW were visiting the site to mark the 50th anniversary
of their deployment to the UK. We were able to tag along
and visit the command bunker and then watch a fly past
by a P51 mustang and a Harvard. Here are the photo's taken
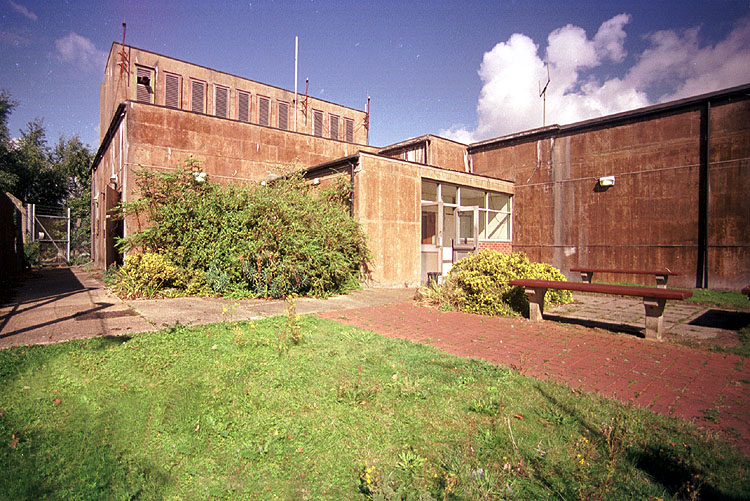
in the command bunker and associated Office block.
Our thanks must go to Doug and Chris Deas for letting us visit the site
 |
 |
 |
 |
|
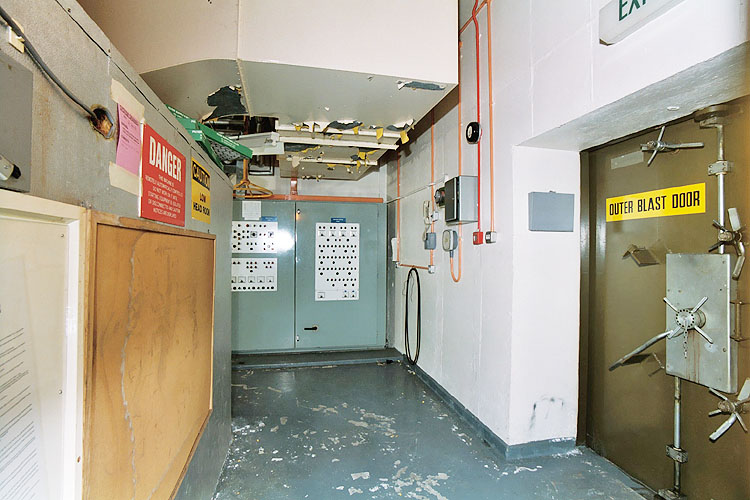
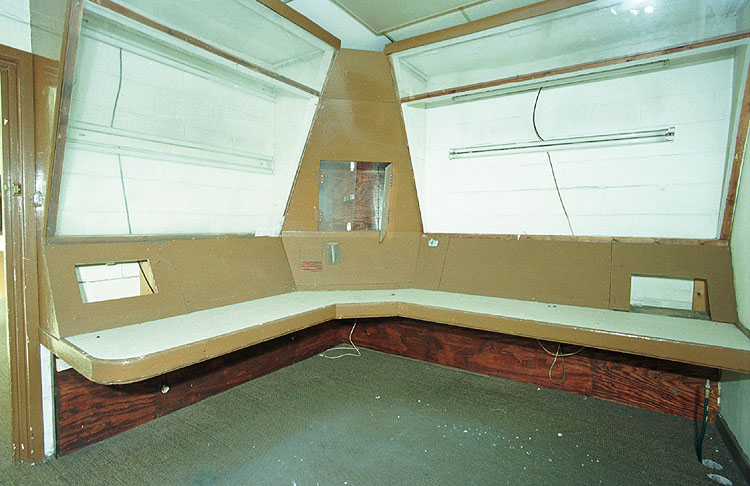
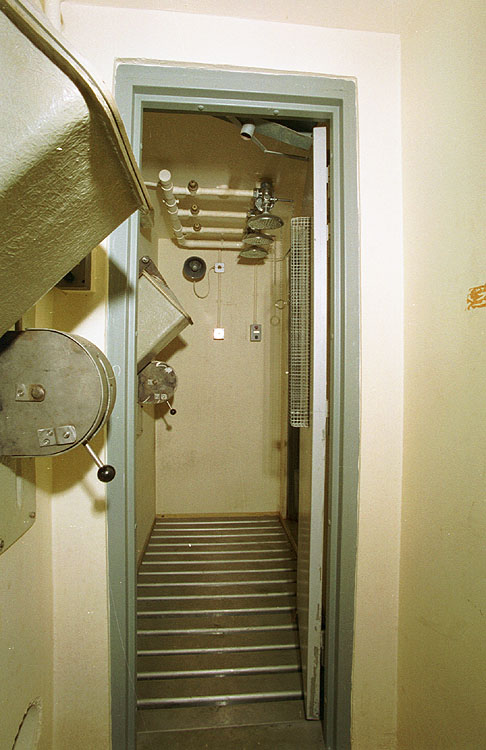
The Main Entrance to the Command Bunker |
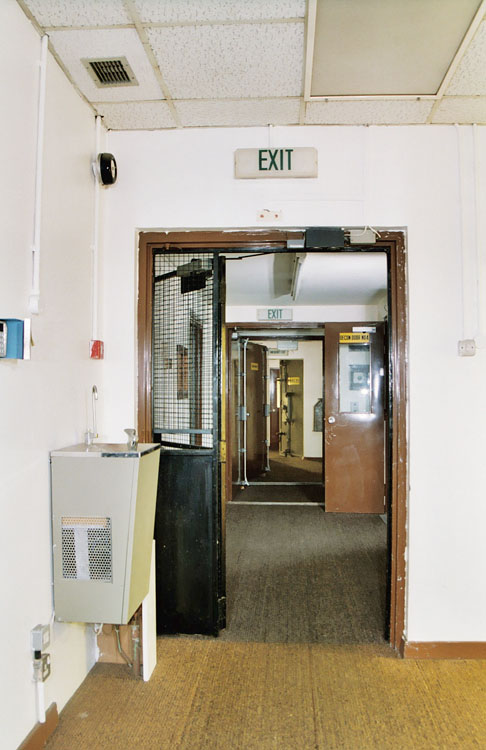
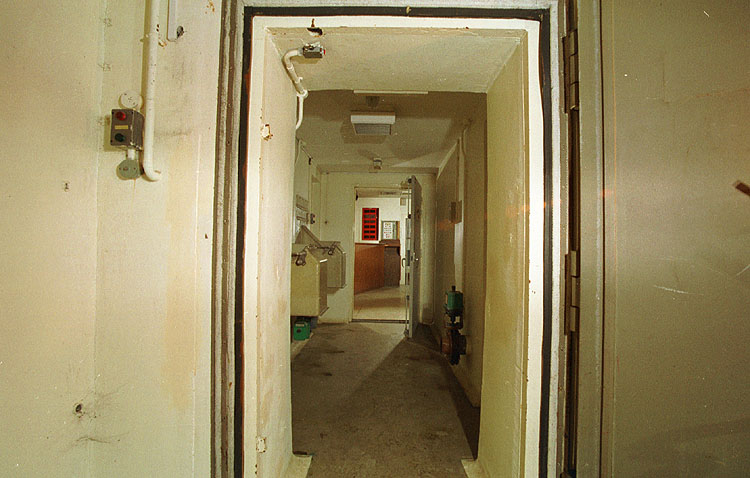
A view looking down the main corridor showing the various security doors |
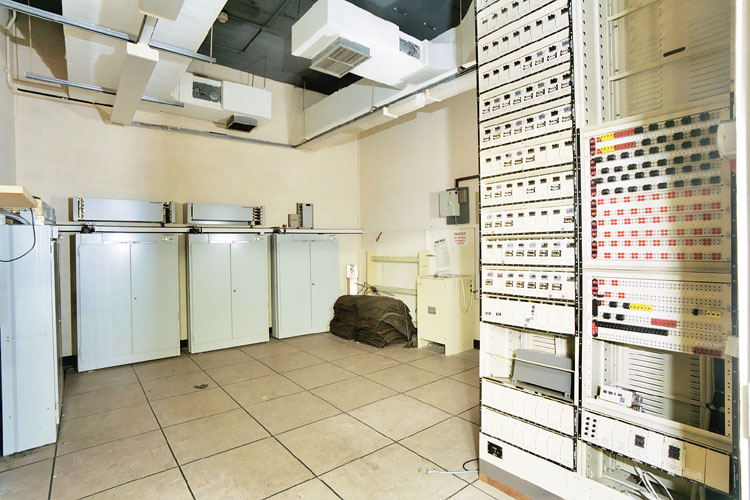
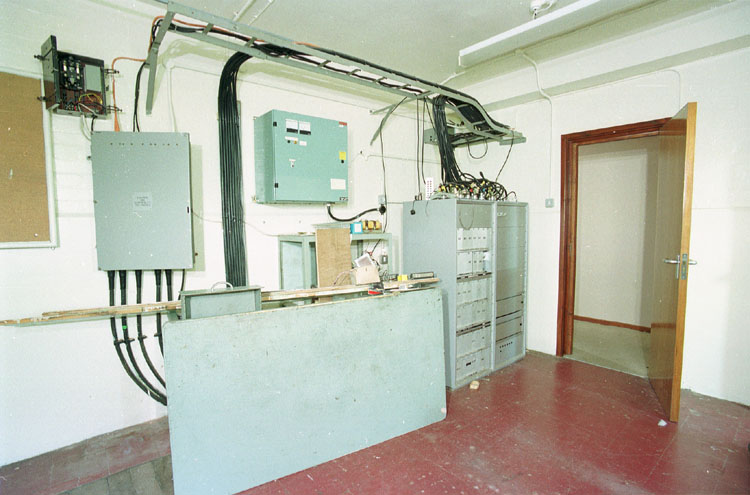
The BT frame room in excellent condition - one of the best ones we have seen |
Another view of the BT frame room I wonder what was in the American racks at the end of the room? |
 |
 |
 |
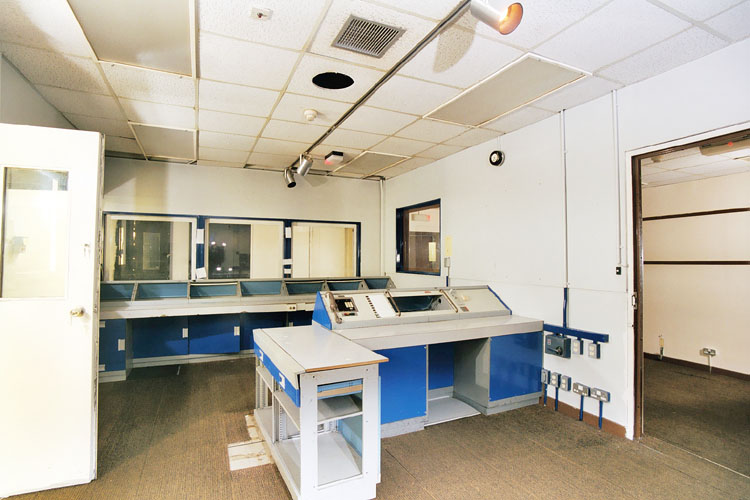 |
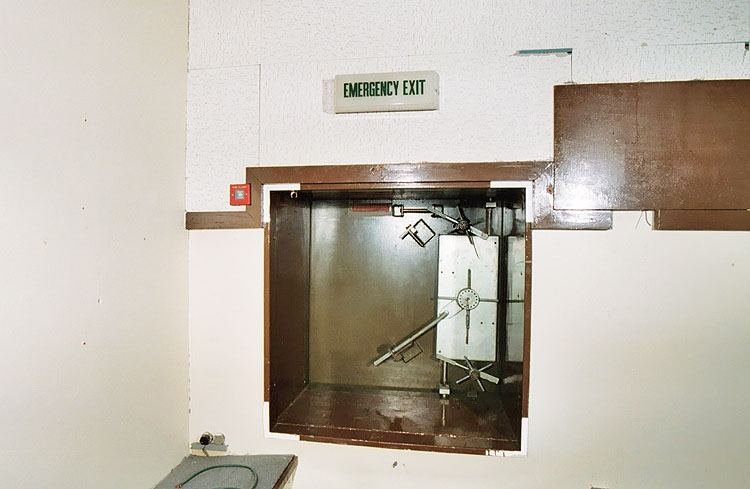
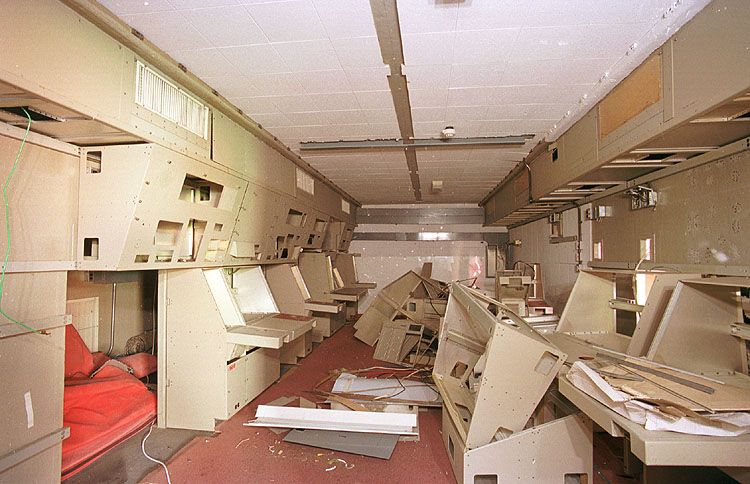
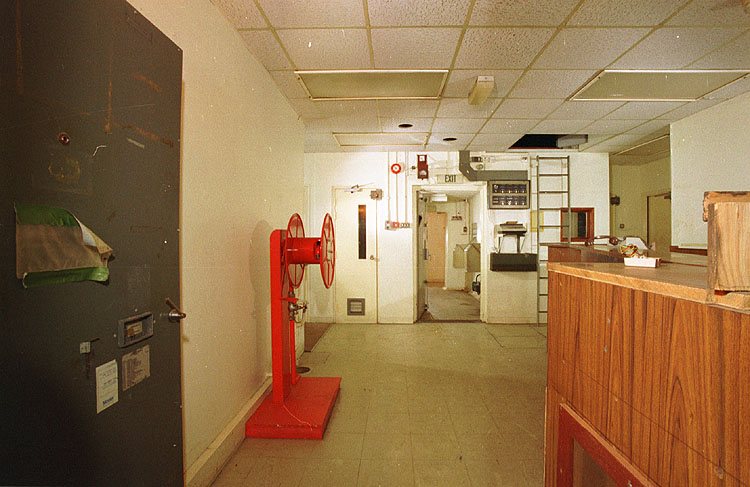
| The Emergency Exit | The Main control room in excellent condition | The Upper left control room looking down onto the main control room | The Upper right control room |
 |
 |
 |
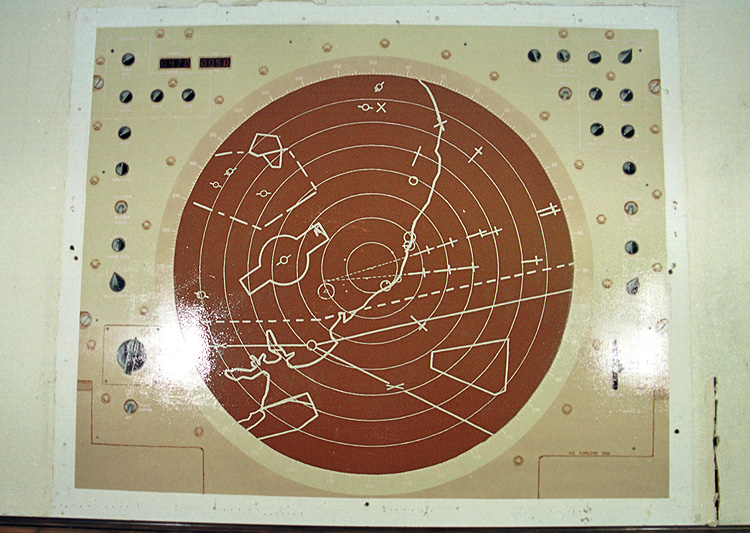 |
| The Clean plant room in working condition | Another view of the Clean plant room | The Radio room in a small prefab type building adjacent to the main office building It looks as if this came from the states in a kit | A mural of a radar screen in one of the rooms in the main office block |
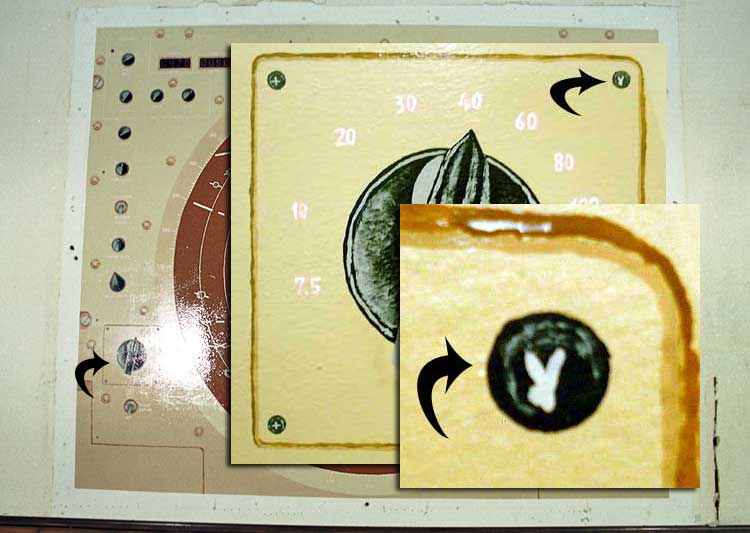
Can you spot the Playboy Bunny
Please Note Bentwaters airfield is NOT open to the public, please don't just turn up you WILL be turned away.
Our Earlier Site Visit
Today
saw Dan McKenzie, Nick Catford and Andrew Smith visit the former RAF
Bentwaters site in Suffolk. This site is now part used as an industrial
park and the rest lies unused but fully secure. The future of the site
is unknown as the owners wanted to open it as a commercial airport for
East Anglia but local council objections have put paid to that idea. The
runway is still used by occasional light aircraft but that is all.
Having arrived we were given the keys (!) to enter the secure area. This
comprises the main runway (1.5 miles long), hard standing, control tower,
bomb stores, protected hangers and other buildings. We made our way to
the first bomb storage area which was located on the other side of the
billiard table smooth main runway.
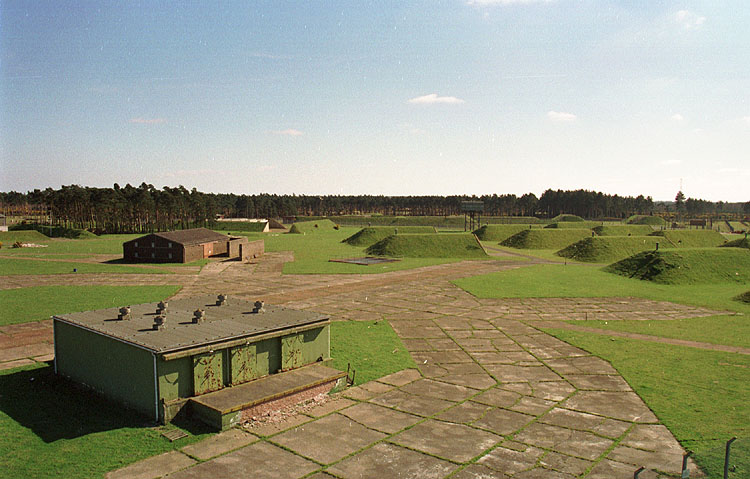
This bomb store was set within its' own fenced area but fortunately the
gate was open so we were able to drive in up to the individual stores.
These were of the standard 'mounded earth' design and were quite large.
Two large sliding doors were at one end to facilitate access into the
store. Many of these stores were open and we entered one of them. All
were identical in this area. There is an air vent with a fire shutter
which was connected to a quick melt piece of wire that would shut the
vent if fire broke out. Inside the light fittings were still in place
although there was no power connected. There were yellow marks on the
floor for vehicle positioning. Having photographed these stores we
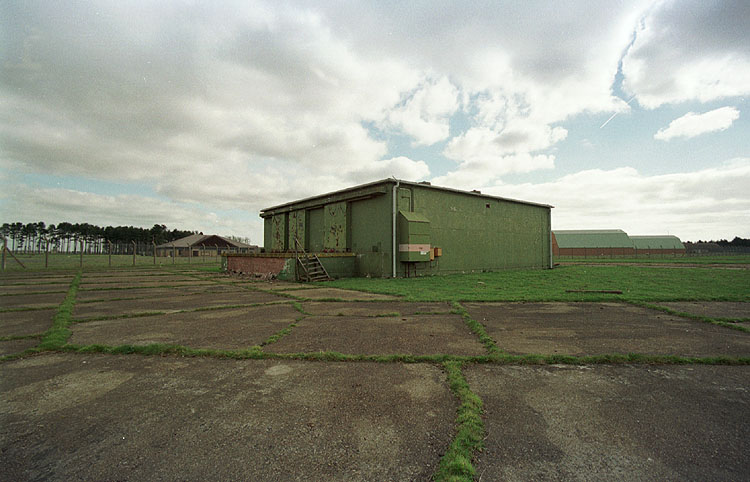
continued around to a large green building that had a loading platform
on each side. Entry to the building is obtained via 3 pairs of large
green sliding doors on each loading bay platform. We were unable to gain
access to this heavily fortified building but looking through a gap in
the doors it appeared to be divided into sections internally. We
continues to walk in this area and came to plant areas that had blast
shielding around them. One of the smaller buildings contained the
remains of a generator and a 240v to 110v converter. Continuing on in
this area we approached the rear fence which backed onto a second much
more substantial and secure bomb storage area. It was interesting to
note that all bomb stores had lightening conductor wires suspended
approx. 20 feet above the roof of the building which were earthed by
metal poles on each side.
 |
 |
 |
 |
|
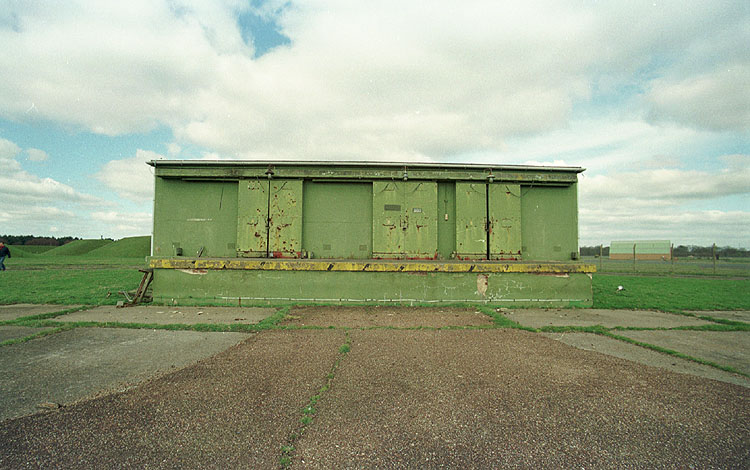
Weapons Store |
Weapons Store |
Weapons Maintenance Facility bldg 402 |
Weapons Maintenance Facility Interior bldg 402 |
 |
 |
 |
 |
|
Weapons Maintenance Facility bldg 402 |
Weapons Store ?
|
Weapons Store ?
|
Weapons Maintenance Facility ? |
At the back of this bomb store was a water tower (not climbed) and 2
buildings that had integral garages. These buildings had fortified
sections within them although their purpose is unclear - possibly
additional security for the bomb store area.
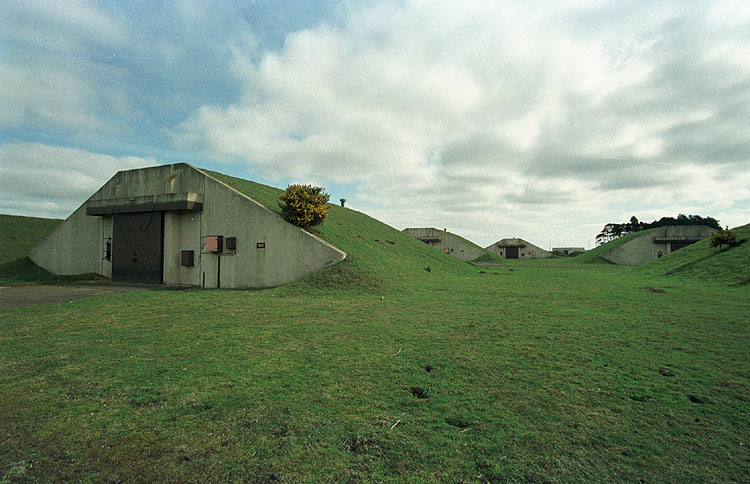
Having completed this area we moved on to the high security bomb store.
We were joined by our guide at this point who had the keys to the gates!
 |
 |
 |
 |
|
Weapons Store Entrance Building |
weapons store "Hot Row" possible nuclear weapons storage |
View from Guard tower |
View from Guard tower |
 |
 |
 |
 |
|
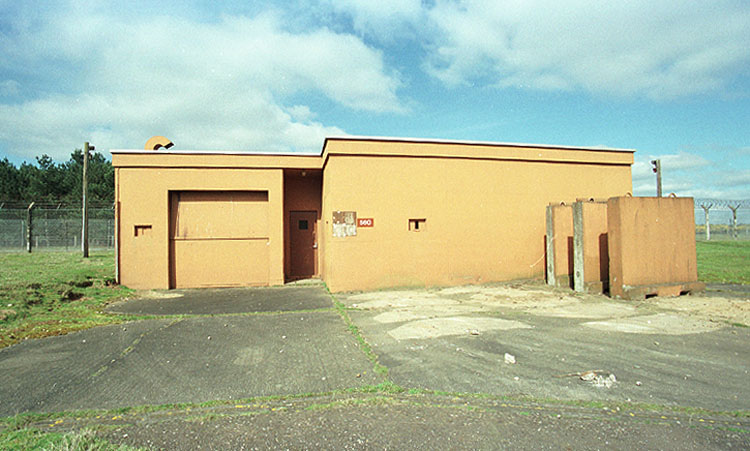
Command Bunker Weapons storage area Bldg 560 |
Command Bunker Weapons storage area Bldg 560 |
Command Bunker Weapons storage area internal control room Bldg 560 |
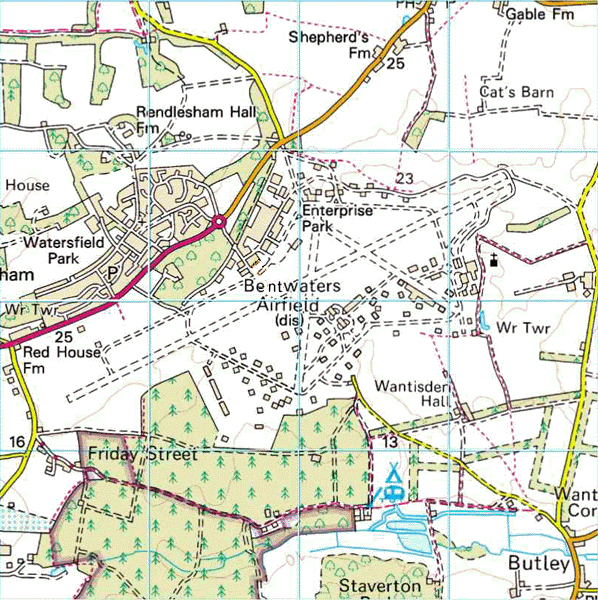
Bentwaters Location Map |
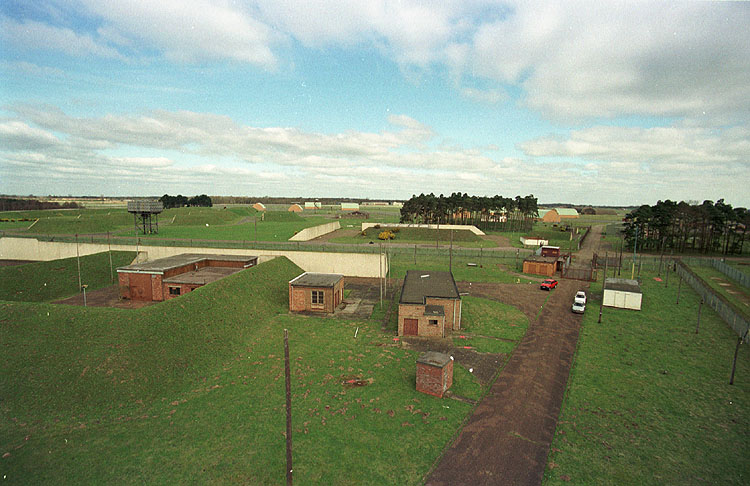
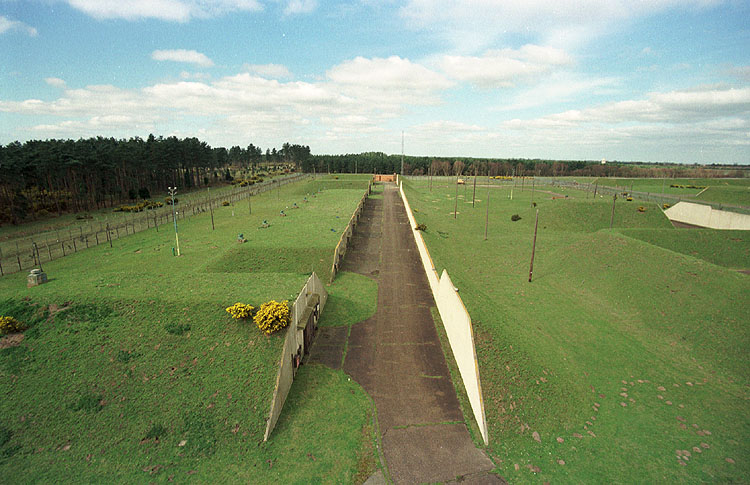
Approaching
the guardhouse along a straight piece of road it was easy to
picture the base when it had been in use. Lying alongside the roadway
were huge steel poles with 6" spikes sticking out of them. These were
obviously used to provide additional protection against vehicles ramming
the very heavy duty gates. They would have been deployed in front of the
gates to deflate the tyres of any bandit vehicle approaching the bomb
store.
Entry to this storage area was through a twin gate system cutting across
all 4 fences including an electrified fence. These fences were in
addition to the fences to enter the airfield proper once past security.
The vehicles would drive into the area alongside the guardhouse and the
outer gate would close behind them. This area was fully floodlit and had
additional lighting at ground level for vehicle inspection. Once papers
were checked and the visitors approved the inner gate would be opened to
allow access to the compound. The guardhouse itself was in tact and had
its' own generators (missing), BT comm's room and a control area with a
commanding view of the gates. Upstairs was a fortified area with gun
holes overlooking the approach road and gate area.
Once inside there is a building to the left that was locked and it's
purpose was unknown but it was not fortified in any way. Directly ahead
was one of the observation towers for the site which we climbed using
the staircase that spiraled its' way around the outside of the legs.
This is a substantial tower and had a fully air conditioned
room at the top which had commanding views over the high security area
and some of the rest of the site. Much of the bullet proof glass had
crazed but we could still see inside and the room was empty. The base of
the tower had substantial concrete shielding against conventional attack
and ramming by vehicles.
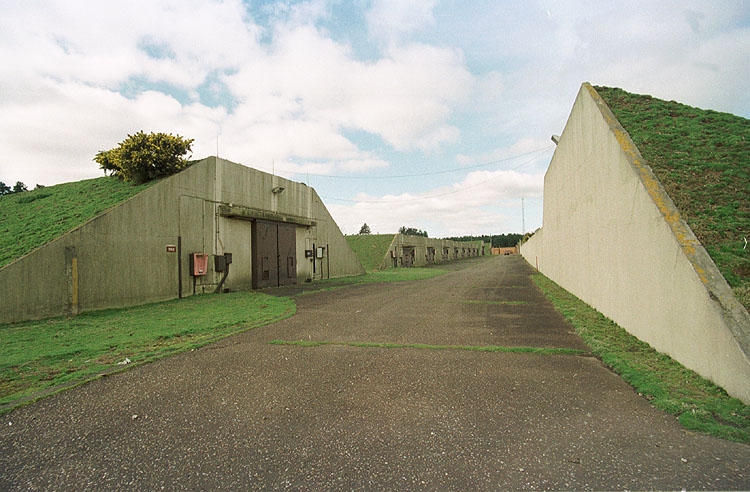
We returned to terra firma and walked along a long line of bomb stores.
Most of these were locked but we found one that was open. These were
similar to the stores in the other compound but had additional blast
walls directly opposite the entry door and the doors themselves were
much more substantial. At the end of this line of stores was a larger
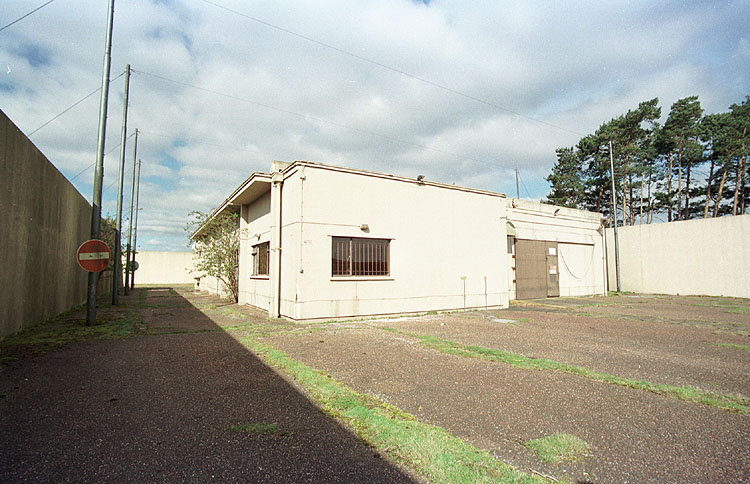
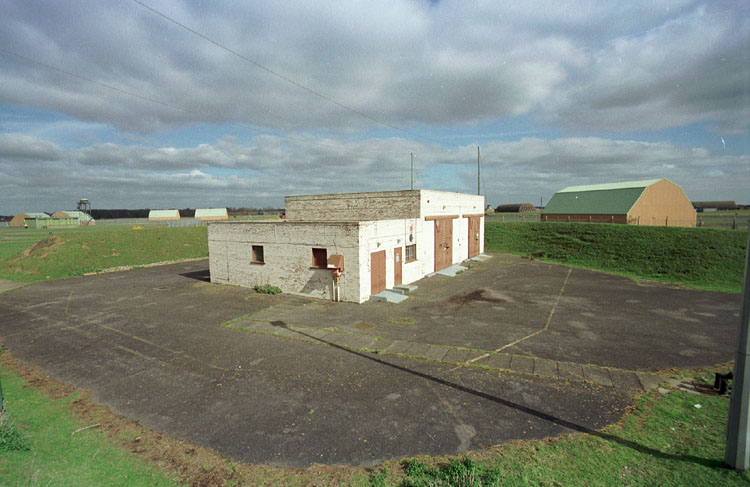
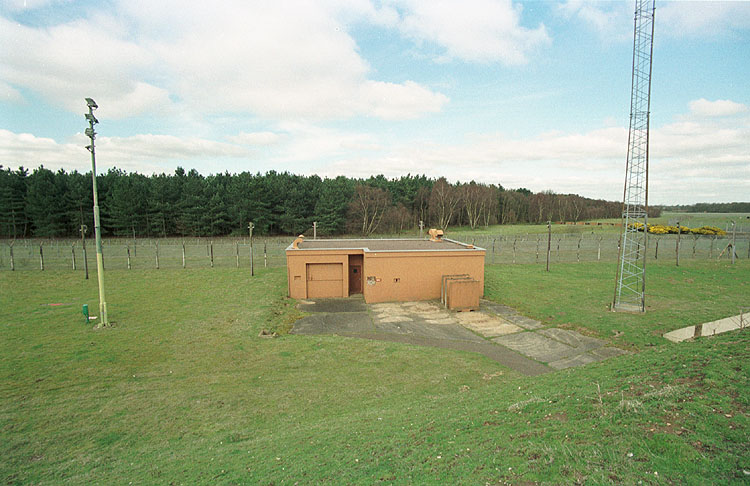
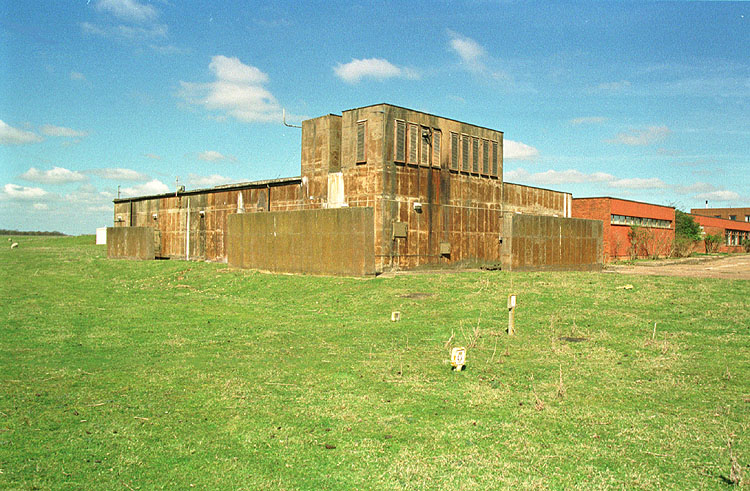
store and then the communications bunker. This is a surface blockhouse
with gun points on all sides and was heavily fortified. We entered and
it comprised a main office/work area, integral garage for a vehicle,
kitchen area, BT room, toilet (only the one) and the comms room itself.
This was stripped of all equipment but had the desks etc still in place
so we were able to get a very good idea of what it looked like when
operational. Alongside this blockhouse was a comms tower that had a
single aerial on it but did not appear to serve any current purpose for
the nearby RAF Woodbridge.
We headed back to the gatehouse via the second row of bomb stores. These
were of a different design and there were only 3 of them. They had
integral garages and there were still cranes inside the buildings in
the vehicle areas. This mat have been where the weapons were loaded onto
lorries for transportation. Heading back to the gate the final building
had a large steel shipping container built in to it in the vehicle area.
This was an integral part of the building and why it was there we
didn't know and neither did our guide. The same building also had an
extremely secure cage in one of the rooms for housing something that
they didn't want anyone to get hold of. What that was we don't know but
was too small for an armoury but too big for anything nuclear. A small
building just to the right of the gate house had what was left of a
generator.
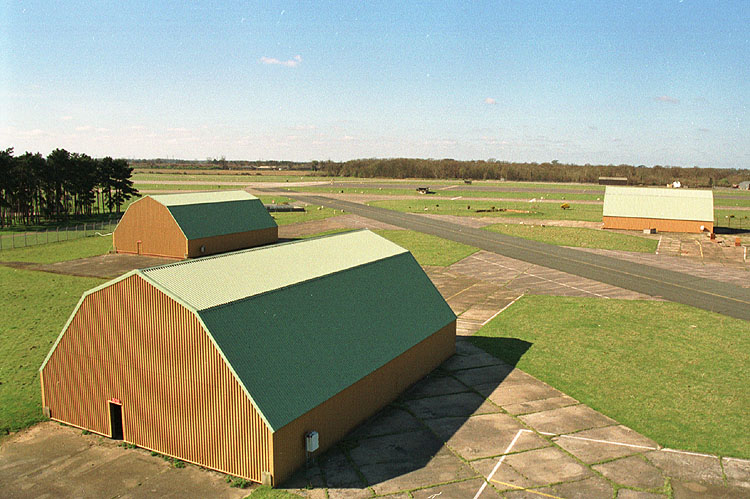
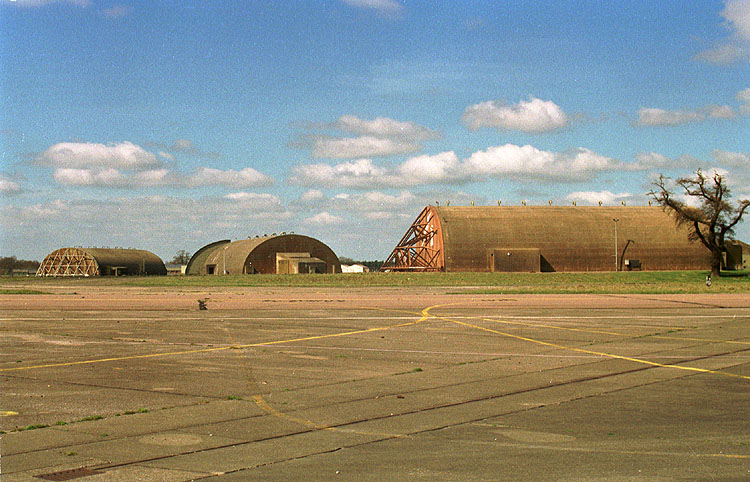
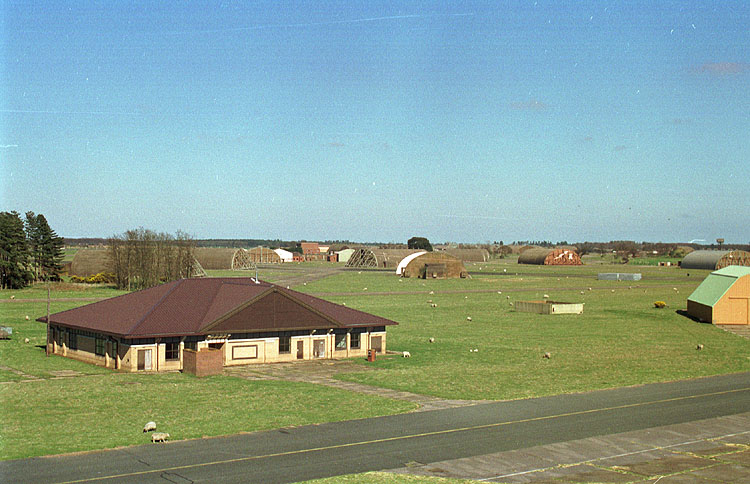
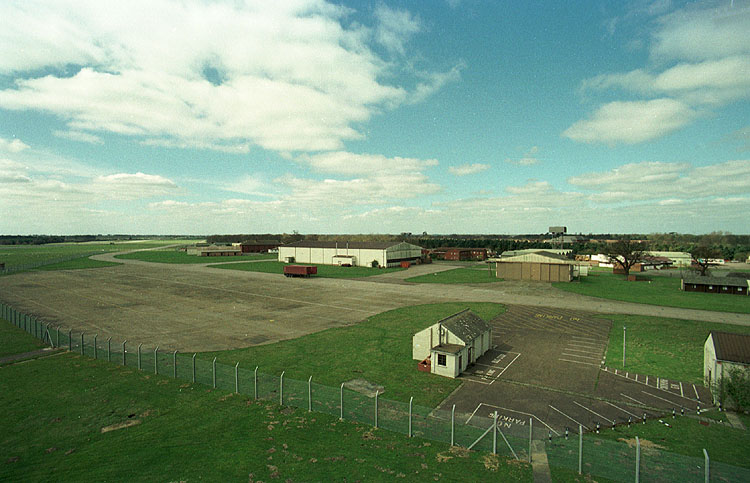
We then went to the control tower. This involved driving across the
airfield past a number of hardened and conventional hangers and a wide
variety of buildings. We managed a short drive along the runway which
was in perfect condition and as smooth as a billiard table.
 |
 |
 |
 |
 |
|
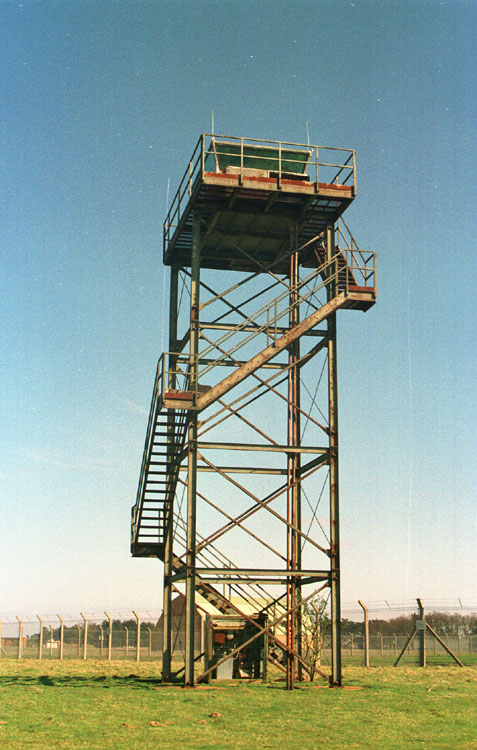
Victor alert area Armed aircraft ready to go would be stationed here |
HAS's including the Bear aggressor squadron area |
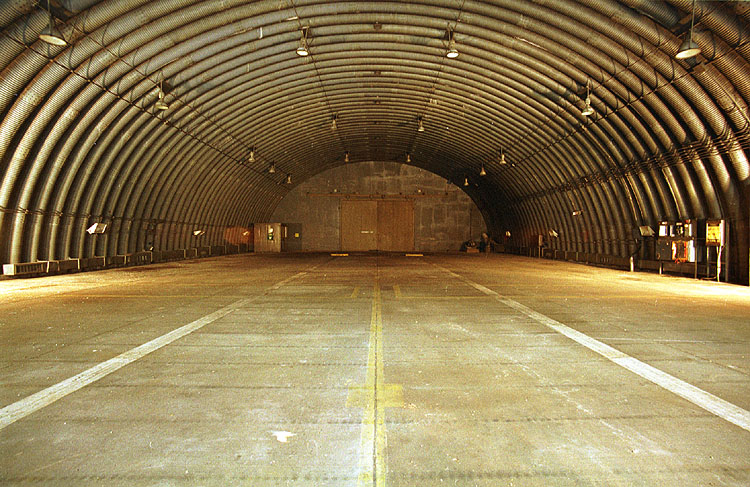
Internal View of Hardened Aircraft Shelter (HAS) |
Hush House used for engine testing |
|
 |
 |
 |
 |
|
|
Guard tower near victor Alert area |
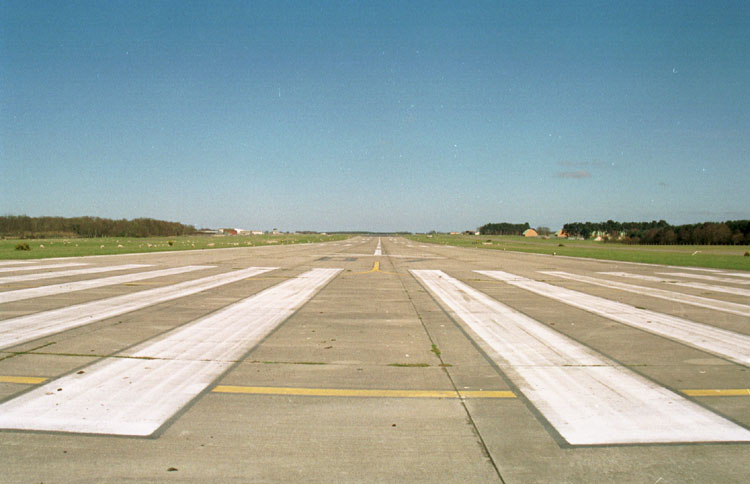
South end of the Runway |
View from the Victor Alert Tower |
View from the Victor Alert Tower |
Bunker in the Woodland Dispersal area |
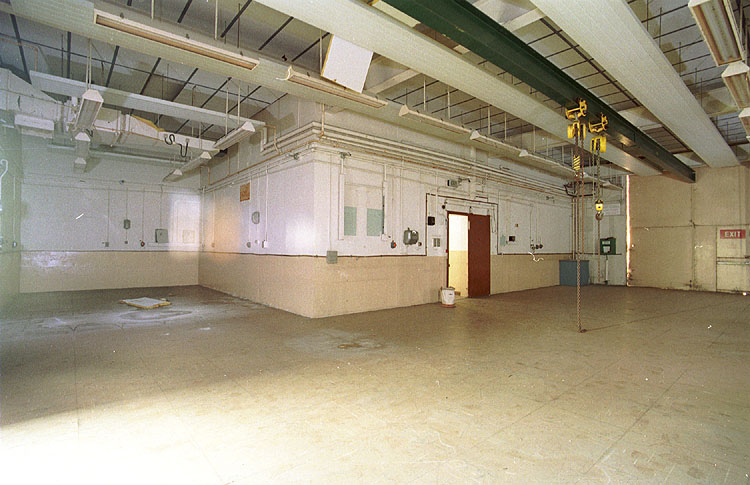
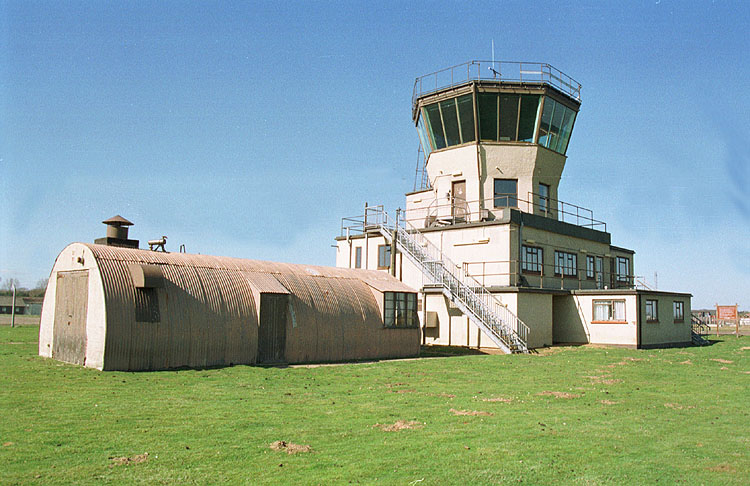
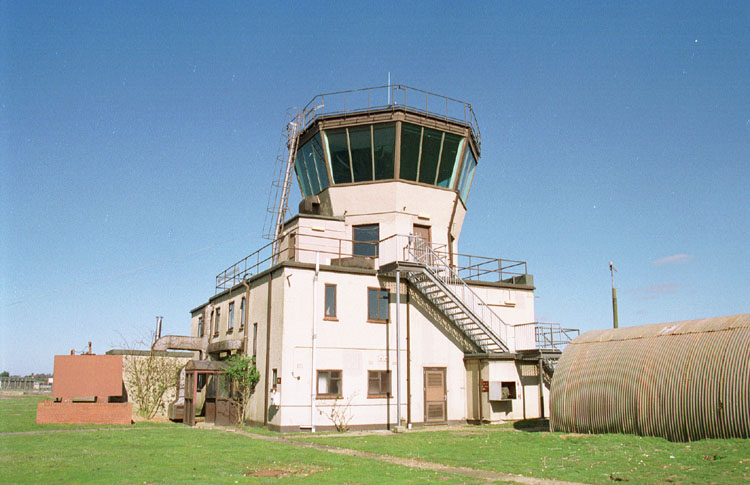
Our guide duly unlocked the control tower which was on 3 floors and
still had the power connected. On the ground floor was a small entrance
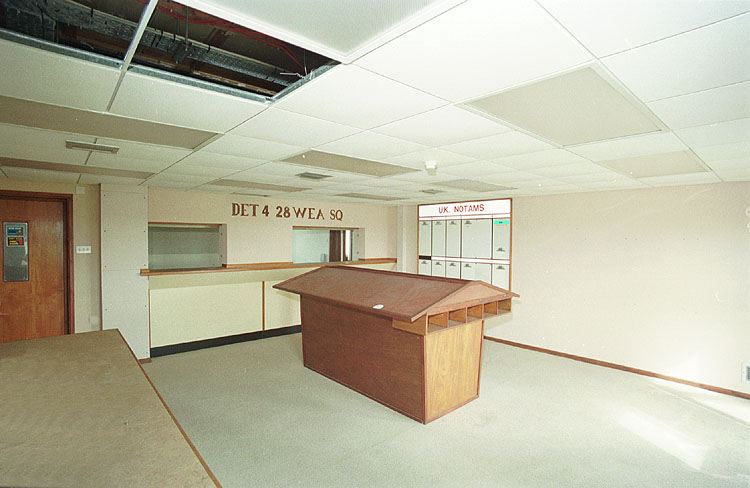
area with a reception room, a larger area led through to a corridor off
which was the BT rack room which still had quite a lot of equipment and
some RF transmission gear. Going upstairs took us to the in tact flight
briefing area complete with NOTAM board and the insignia of 2 USAF
Squadrons that must have been stationed there at some point.
|
|
 |
 |
 |
|
Runway from the Southern end |
Control Tower with Quonset hut - bird Control building |
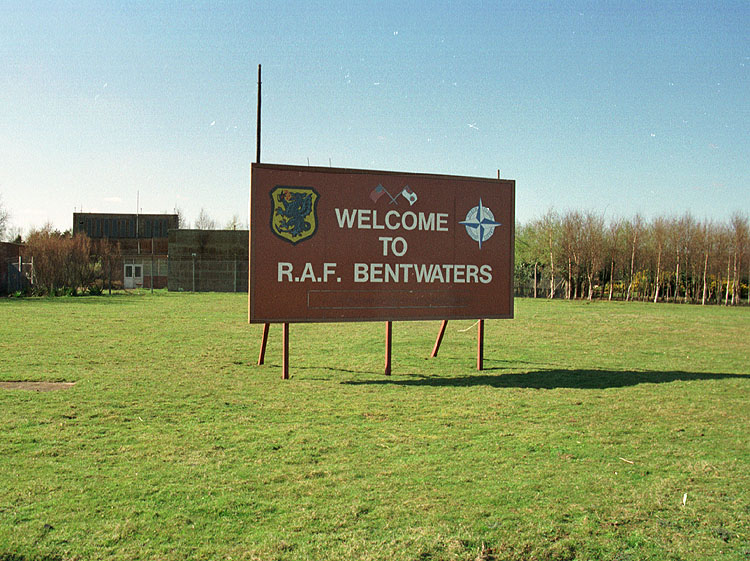
Welcome to Bentwaters |
Control Tower |
 |
 |
 |
 |
|
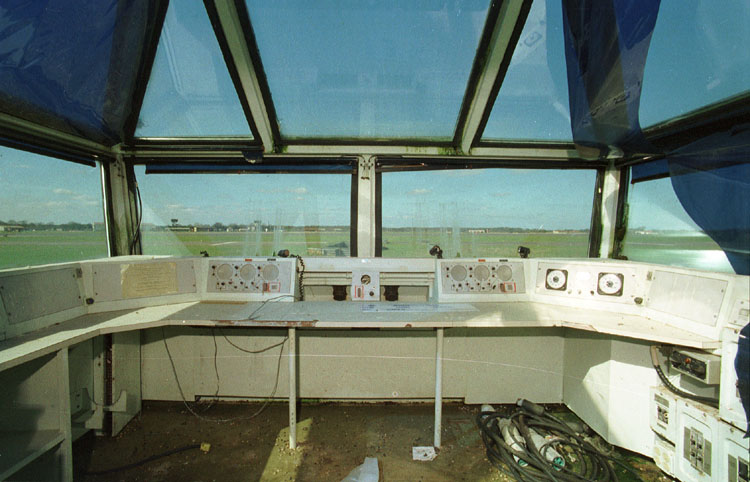
Planning room on 1st floor of Control Tower |
Control Tower |
Control Tower Radio room Ground floor |
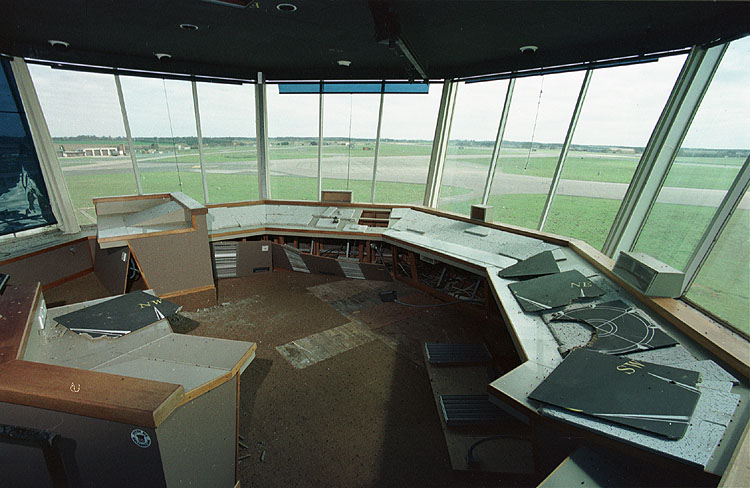
Control Tower view from the Roof looking S.E. |
The
top floor comprised the aircraft control room and whilst all of the
equipment was missing it was still in reasonable condition and had the
points of the compass painted on the ceiling tiles. This gave an
excellent view of the airfield operational areas.
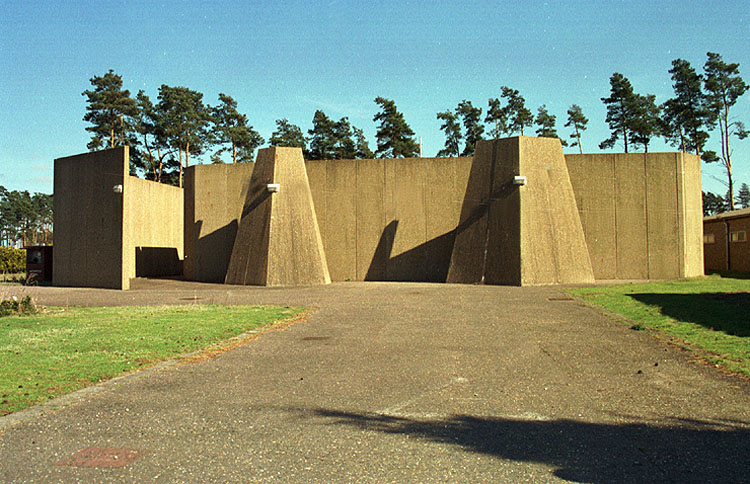
With these additional security areas duly photographed our guide left us
and we had the total freedom of the airfield and buildings for the rest
of the day. We headed back to one of the fortified buildings we had
passed and entered via a blast door. This was one of the Squadron
buildings and was equipped with a full decontamination unit, plant room,
blast doors etc and according to the signs could be fully sealed in the
event of attack by NBC agents.
 |
 |
 |
 |
 |
|
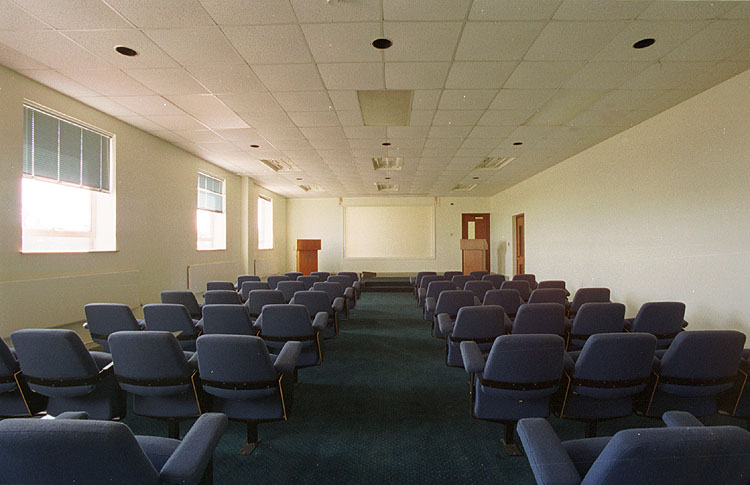
Wing Command centre Bunker |
Command centre Lecture Theatre |
Entrance to the Bunker |
Reception area |
|
 |
 |
 |
 |
|
|
Decontamination Room |
Command centre (WOC) |
Blast Door |
Standby Control Tower |
Standby Control Tower |
We then moved on to photograph some of the fortified and conventional
hangers/aircraft shelters and the remaining buildings including a
standby control tower which still had a lot of equipment present in it.
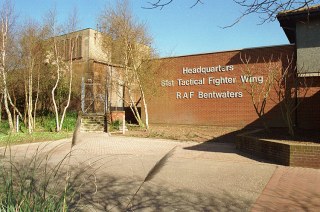
After this we headed over to the old command bunker which is now in
commercial use so we were unable to gain internal access. However, we
did find hidden in the trees nearby a very well concealed bunker which
we were able to access but it was just a series of empty rooms.
Most of the site is used for sheep grazing and it is totally secure with
24hr security on the entrance gate (no entry except on business) and
regular patrols plus the additional fencing to get through to reach the
main airfield area.
Please Note: The former Bentwaters airfield is NOT open to the public, please don't just turn up you WILL be turned away. Why not visit the Museum?
![]()
Updated 03/09/2008 Copyright Dan McKenzie